 Audio (343) Audio (343)
Datatype (51)
Demo (203)
Development (596)
Document (22)
Driver (97)
Emulation (147)
Game (1004)
Graphics (497)
Library (115)
Network (232)
Office (66)
Utility (923)
Video (69)
Total files: 4365
Full index file
Recent index file
Amigans.net
OpenAmiga
Aminet
IntuitionBase
|
Simcoupe | | Description: | SAM Coupé Emulator | | Download: | simcoupe.lha (TIPS: Use the right click menu if your browser takes you back here all the time) | | Size: | 875kb | | Version: | 1.2 | | Date: | 19 Dec 2012 | | Author: | Simon Owen Amiga port by Ventzislav Tzvetkov | | Submitter: | Ventzislav Tzvetkov | | Email: | drhirudo/amigascne org | | Homepage: | http://www.simcoupe.org | | Category: | emulation/computer | | Replaces: | emulation/computer/simcoupe.lha | | License: | GPL | | Distribute: | yes | | Min OS Version: | 4.0 | | FileID: | 7583 | | | | Snapshots:
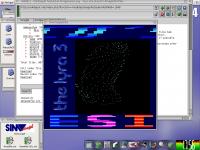 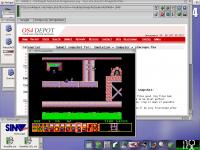 | |
| | Comments: | 0 | | Snapshots: | 2 | | Videos: | 0 | | Downloads: | 279 (Current version) | | 544 (Accumulated) | | Votes: | 0 (0/0) (30 days/7 days) | |
      SimCoupe - A SAM Coupe Emulator
Version 1.0, released 21st July 2006
By Simon Owen <simon.owen()simcoupe.org>
* * * * * * * * * * * * * * * * * * * * * * * * * * * * * * * * * * * * * *
INTRODUCTION
SimCoupe emulates the SAM Coupe home computer - a Z80-based machine released
in 1989 by Miles Gordon Technology. See the Links section at the end of
this document for more information, including history and technical
specifications.
This release of SimCoupe was derived from Allan Skillman's SimCoupe 0.72 for
DOS and Unix. It has been largely rewritten to improve accuracy and
portability. Versions currently exist for Windows 9x/Me/NT/2000/XP/2003,
Mac OS X, Linux, Pocket PC, BeOS, QNX, Solaris, DOS, Amiga OS 4 and the
PlayStation Portable.
* * * * * * * * * * * * * * * * * * * * * * * * * * * * * * * * * * * * * *
LOADING SOFTWARE
The SAM starts up ready to accept BASIC programs, with software loaded from
tape or disk.
The steps required to boot a disk on a real SAM are:
1) Press the reset button to Return to the start-up screen
2) Insert disk in floppy drive 1
3) Press F9 (or enter BOOT) to boot the disk
The equivalent steps in SimCoupe are:
1) Press F12 to reset the emulated SAM
2) Press F1 to browse for a disk image
3) Press Numpad-9 or type BOOT and press Enter
The default SimCoupe settings actually make the final step unnecessary -
disks inserted into drive 1 at the SAM start-up screen are booted
automatically. To boot a disk inserted at any other time, press F12 to
reset then Numpad-9 to boot (Numlock must be On).
Commercial titles will start automatically when booted, but some SAM disks
found online may not. Here are the common failure messages:
"55 Missing Disk, 0:1"
There's no disk in drive 1 - did you insert into drive 2 instead?
"19 Loading error, 0:1"
The boot sector (track 4, sector 1) could not be loaded. The disk could
be unformatted or may be damaged.
"53 No DOS, 0:1"
The disk does not have a valid boot sector, and cannot be booted. The
default SimCoupe settings avoid this error by substituting an internal DOS
image, so you're more likely to see the following error instead.
"101 no AUTO* file, 0:1"
DOS was booted, but no filename startig with "auto" was found to load.
To avoid this error, boot using BOOT 1 instead, which loads DOS but doesn't
attempt to auto-run any file. Try DIR 1 to list the files on drive 1, then
LOAD n, where n is a file number to load.
"0 OK, 0:1"
DOS was loaded and an "auto" file was found, but there was no auto-run
line number to execute from. Use LIST to check for a BASIC listing, and RUN
to execute it. Otherwise use DIR 1 for a directory listing, to manually
select a file to load.
* * * * * * * * * * * * * * * * * * * * * * * * * * * * * * * * * * * * * *
DISK IMAGES
SimCoupe can use software in the following disk image types:
MGT - Simple sector dump of +D/SAM disks: 2 sides, 80 tracks/side, 10
sectors/track, 512 bytes/sector = 819200 bytes. Compatible with the
/dev/fd0u800 device under Linux. Traditionally named with a .dsk extension,
but renamed to match the existing .mgt Spectrum image format.
SAD - SAm Disk format, created by Aley Keprt. Also a simple sector dump,
but with a 22-byte file header allowing disk-wide geometry adjustments to
sides/disk, tracks/side, sectors/track and bytes/sector. Normal SAM disks
stored in SAD format are 819222 bytes, but a difference in track order
prevents removing the 22-byte header to give an equivalent MGT image.
Version 2 SAD images are the same basic format, but compressed using gzip.
SDF - Sam Disk format, created by Simon Owen. A stop-gap image format able
to represent custom formats needed by copy-protected disks. Images sizes
are 983040 bytes for 80 tracks or 1019904 bytes for 83 tracks. Soon to be
phased out in favour of EDSK images. This format is read-only in SimCoupe.
EDSK - Extended DSK images, originally designed for Amstrad CPC and Spectum
+3 disks. A flexible format able to represent all existing SAM disks, and
also the preferred format used by the worldofsam.org archive. Images size
is directly linked to the disk geometry, with a normal SAM disk using 860416
bytes. Image files use a .dsk extension.
TD0 - Images created by the TeleDisk utility for DOS, as used in the early
1990s. A very flexible format, but no longer used because the software
doesn't work on PCs faster than a slow 486. Most TD0 images on the NVG FTP
archive have now been converted to either MGT or EDSK formats. This format
is read-only in SimCoupe.
SBT - Sam BooTable files, created by Andrew Collier. These are
self-booting files designed to be copied to an empty SAM disk, then booted.
While not technically disk images, SimCoupe treats them as such (read-only).
* * * * * * * * * * * * * * * * * * * * * * * * * * * * * * * * * * * * * *
REAL DISKS
With only a few exceptions, original SAM disks can be used directly in
SimCoupe under Windows 2000/XP and Linux. Even custom-formatted titles such
as Lemmings and Prince of Persia can be booted directly from original disks.
Windows 2000/XP require use of a free driver for complete control over the
floppy drive. This is a one-time install, and must be run by a user with
Administrator access rights. The driver installer is available from:
http://simonowen.com/fdrawcmd/
To use real disks under Windows 2000/XP:
1) Install the fdrawcmd.sys driver, if not already installed
2) Insert your SAM disk into PC drive A:
3) Select "Open A:" from the File menu to use as SAM drive 1
4) Boot/use the disk as normal
To use real disks under Linux:
1) Ensure your user has read-write access to /dev/fd0
2) Insert your SAM disk into PC drive A:
3) Press F1 to browse for a drive 1 disk
4) Browse to /dev/fd0 and click OK
Note: USB floppy drives don't allow access to the floppy controller, which
is needed for real disk access in SimCoupe. Only floppy drives connected to
a motherboard floppy controller will work.
* * * * * * * * * * * * * * * * * * * * * * * * * * * * * * * * * * * * * *
FLOPPY TRANSFERS
For occasional access to original SAM disks, the real disk feature is
usually the most convenient option. For regular use it's better to create a
disk image, and use that in SimCoupe instead. If you only need to transfer
a single data file in or out of SimCoupe, use the Import Data (F4) or Export
Data (Shift-F4) features instead.
If you're writing disk images back to a real floppy, you must use only
original double-density disks. The lower magnetic sensitivity of
high-density disks make them unsuitable for double-density use, even if you
cover the density hole. As a very rough guide, double-density disks are
generally blue and high-density disks are black.
Windows 2000/XP/2003
Use SamDisk, available from http://simonowen.com/sam/samdisk/
To create a disk image from an existing SAM floppy disk:
SamDisk.exe /m a: myimage.dsk
To write a disk image back to a real floppy disk:
SamDisk.exe /f myimage.dsk a:
The /m option copies only the used portions of the disk, which speeds up the
transfer of most disks. The /f option formats the disk before writing it,
which can be omitted to save time if your disk is already formatted.
The current version of SamDisk (2.0) supports only MGT disk images. The
next release (due soon) will also support copy-protected and other custom
disk formats.
Windows 98/98/Me
Use Edwin Blink's Disk Image Manager, available from:
http://home.wanadoo.nl/edwin.blink/samcoupe/software/diskmanager/diskmanager
.htm
To create a disk image from an existing SAM floppy disk:
1) Insert your SAM disk in A:
2) On the 'Sam disk' menu, select 'Load'
3) On the File menu, select "Save diskimage as..."
4) Browse to a suitable save location and name the new image
To write a MGT/SAD disk image back to a real floppy disk:
1) On the File menu, select "Open diskimage"
2) Browse to find the existing image
3) Insert your SAM disk in A:
4) On the "Sam disk" menu, select "Save"
Disk Image Manager supports MGT (with a .dsk extension) and SAD disk images.
It can also be used to add/extract single files from both real disks and
disk images.
MS-DOS/FreeDOS
For MGT/SAD images and imaging normal SAM disks, use Aley Keprt's utilities:
http://www.keprt.cz/progs/samutils/readme.html
For EDSK images and possibly copy-protected disks, use CPDRead and CPDWrite:
http://www.simcoupe.org/cpdtools.zip
The CPDRead utility was designed to work with Amstrad CPC disks, but works
just as well for SAM disks too. The version in the archive above has been
modified to read 82 tracks from both sides of the disk.
Linux
MGT images are directly compatible with the /dev/fd0u800 floppy device.
If /dev/fd0u800 doesn't already exist, create it as root using:
mknod /dev/fd0u800 b 2 120
To create a disk image from an existing SAM floppy disk:
dd if=/dev/fd0u800 of=image.mgt conv=noerror,sync
To write a disk image back to a real floppy disk:
dd if=image.mgt of=/dev/fd0u800 conv=noerror,sync
To format a new SAM disk use:
fdformat /dev/fd0u800
To create a blank disk image use:
dd if=/dev/zero of=image.mgt bs=512 count=1600
Custom-formatted and copy-protected disks cannot be transferred using this
method, but most can still be used directly in SimCoupe by opening /dev/fd0
for floppy 1.
* * * * * * * * * * * * * * * * * * * * * * * * * * * * * * * * * * * * * *
HARD DISKS
SimCoupe emulates 3 SAM hard disk interfaces: Atom, SD-IDE and Yarek.ATMOD.
The Atom is the most commonly used, mainly because Atom's DOS (BDOS) is
compatible with the original SAMDOS. The hard disk is treated as an array
of floppy-sized records, giving good compatibility with existing software.
Real hard disks and compact flash (CF) cards can be used under Windows
2000/XP, Linux and Mac OS X. This gives a fast and reliable way to share
data between with a real SAM machine. For your safety, only existing
Atom-formatted disks can be opened in SimCoupe, so be sure to format them on
the real SAM first.
If you don't have a real device to use, you can still work with existing
hard disk images files (HDF):
1) Press F10 to open the SimCoupe options
2) In the Disks section, click "..." next to the Atom interface type
3) Browse to select an existing HDF image file to use
4) Click OK twice and you're ready to boot BDOS
To create and prepare a new HDF image:
1) Press F10 to open the SimCoupe options
2) In the Disks section, click "..." next to the Atom interface type
3) Enter a new path and size in megabytes (32MB = 40 floppy records)
4) Click OK twice to create the disk and return to the emulation
5) Boot a BDOS version (1.6e is recommended)
6) With "Floppy drive" selected, press Cursor-right to view the files
7) Select "Formatter" and press Enter
8) Press Enter again, then "Y" to begin the Atom format
9) Your HDF image is now ready to use!
For more details on using BDOS, visit Edwin Blink's site:
http://home.wanadoo.nl/edwin.blink/samcoupe/software/bdos/bdos.htm
Windows 2000/XP
1) Insert your CF card in the USB reader
2) In SimCoupe, press F10 to open the options
3) In the Disks section, click the combo-box down-arrow for the Atom
4) Select the device to use (typically \.PhysicalDrive1)
5) Click OK twice and you're ready to boot BDOS
Linux
The details for discovering the IDE/CF device path will depend on the Linux
distribution you're using, but is usually one of the following:
- For IDE hard disks, try "fdisk -l" as root to list available devices
- For USB devices, try "tail -f /var/log/messages" then inserting it
- Failing those, browse through the raw "dmesg | less" output
Once you've found the device path:
1) In SimCoupe, press F10 to open the options
2) In the Disks section, enter the device path for the Atom hard disk
3) Click OK then Close, and you're ready to boot BDOS
Mac OS X
1) Insert the CF card in your USB reader
2) When warned about an unreadable disk, click Ignore
3) Open Disk Utility and select your CF volume (orange USB icon)
4) Click Info on the toolbar, and find the Disk Identifier (such as disk1)
5) Prefix the identifier with "/dev/r" for the device path (/dev/rdisk1)
6) In SimCoupe, press Cmd-F10 to open the options dialog
7) In the Disks section, enter the device path for the Atom hard disk
8) Click OK then Close, and you're ready to boot BDOS!
In most cases you only need to determine the device path once, as it will be
the same the next time you insert it. It will only change if other disk
devices have been added/remove in the meantime.
* * * * * * * * * * * * * * * * * * * * * * * * * * * * * * * * * * * * * *
PRINTING
SimCoupe supports print-to-file on all platforms, making it easy to export
code listings to a plain text file. Configure as follows:
1) Press F10 to open the options
2) Select the Parallel section
3) Under the Port 1 drop-down, select Printer
4) In the Printer Device section, select "File: prntNNNN.txt"
5) Click OK to accept the new settings.
You can now print from most applications, and use LLIST to print BASIC
listings. The output will be saved to a file in your Data Files directory,
with a unique name matching the template "prntNNNN.txt".
Under Windows NT4/2000/XP you can also print to a real printer by selecting
the device name in step 4) above. Please note that only true SAM-compatible
printers can be used, particularly if you're printing non-text output. If
your device is not compatible, use the print-to-file option then open and
print the text output.
* * * * * * * * * * * * * * * * * * * * * * * * * * * * * * * * * * * * * *
KEYBOARD INPUT
The default SAM keyboard mode allows letters, digits and symbols to be typed
as normal on your keyboard, with SimCoupe automatically converting them to
the appropriate SAM key sequence. There's also a Spectrum mapping mode to
use when running Spectrum software, and a raw mode to disable the mappings.
The SAM has a keypad of function keys from F0 to F9 located on the
right-side of the keyboard. For similar key positions in SimCoupe, the SAM
keypad is mapped to the numeric keypad on your keyboard. You'll need to
have Numlock enabled for these keys to be recognised. Don't forget that
when SAM software refers to function keys, you must use the numeric keypad
instead!
F1 to F12 keys on your keyboard are used for emulator functions, with the
default mappings shown below. Under OS X, keys F9 to F12 are used by Expose
and Dashboard, so you'll need to hold the Command key in addition to the
combinations below to access them.
F1 = Open disk 1
Shift-F1 = Eject disk 1
Alt-F1 = New disk 1
Ctrl-F1 = Save disk 1
F2 = Open disk 2
Shift-F2 = Eject disk 2
Alt-F2 = New disk 2
Ctrl-F2 = Save disk 2
F3 = Release mouse capture
F4 = Import data
Shift-F4 = Export data
Alt-F4 = Exit application
F5 = Toggle 5:4 display
Shift-F5 = Change window size
F6 = Change frame-skip mode
F7 = Toggle 50Hz frame-sync
F8 = Toggle fullscreen
F9 = Change profiler mode
Shift-F9 = Save screenshot
F10 = Options
Shift-F10 = Debugger
F11 = NMI Button
F12 = Reset button
Ctrl-F12 = Exit application
The following emulator keys are also defined, but can't be re-mapped:
PrintScrn = Save SAM screenshot in PNG format
Pause = Pause emulation (screen is dimmed whilst paused)
Scroll Lock = Pause emulation
Ctrl-Break = Reset
Keypad - = Reset
Keypad + = Turbo (see below)
Keypad * = NMI
While paused, press Shift+Pause to advance by a single SAM frame (1/50th of
a second). You can also use the screenshot feature to capture the frozen
frame, though it won't be saved until SimCoupe is unpaused.
Turbo mode disables the frame sync and sound, and limits the display to just
5 frames per second. This usually gives a big speed boost, which is useful
for zooming through slow sections in games and demos, etc.
SAM shift modifier keys and special symbols are mapped as follows:
Insert = Inv
Left-Ctrl = Symbol
Right-Ctrl = Cntrl
Left-Alt = Cntrl
Right-Alt = Edit
Menu Key = Edit
` (backtick) = (c)
. (on keypad) = (c)
The following additional combinations are also provided for convenience,
since they map common keys to the equivalent function on the SAM:
Native key SAM key
---------- -------
Delete = Shift-Delete
Numlock = Symbol-Edit (toggles SAM BASIC keypad mode)
Home = Cntrl-Left
End = Cntrl-Right
Page Up = F4
Page Down = F1
* * * * * * * * * * * * * * * * * * * * * * * * * * * * * * * * * * * * * *
DEBUGGER
The debugger is unfinished, but is still functional enough to be useful. It
provides code, text, data and graphics views of memory, with typical
debugging functions such as single-steppinga and execution breakpoints.
The debugger starts in disassembly view, highlighting the next instruction.
The register panel on the right shows the current system state.
Register panel
The first 7 lines of the panel show Z80 register values, with changed
registers display in pink text. Below it are the current interrupt mode,
and the interrupt state (EI or DI).
To the right of the interrupt state are 5 flags: O=midi-out, F=frame,
I=midi-in, M=mouse and L=line. These letters are visible when the
corresponding interrupt type is active in the status port (249).
ROM0/ROM1/WPROT show whether ROM0, ROM1 or RAM write-protection are active.
White text is used for the active state, and dark grey inactive.
L/H/V/LE/HE are the current LMPR, HMPR, VMPR, LEPR and HEPR page numbers,
with M showing the current screen mode (1-4).
Scan line:cycle shows the current TV line (0 to 311) and the current cycle
position within the line 0 to 383.
T-diff shows the difference in tstates since the last view change. When
single-stepping it represents the time for the last instruction, including
CPU/ASIC contention. Stepping over a CALL will give the time for all code
inside it, which provides a handy method of profiling code.
The register panel is still relatively crude, and the layout is likely to be
improved in the future. It will also be extended to view other hardware
states, including the SAA 1099 sound chip and floppy disk controllers.
Keys for all views:
A = enter new view address
D = disassembly view
T = text view
N = number view
G = graphics view
L = change LMPR page
H = change HMPR page
V = change VMPR page
M = change screen mode
Ctrl-0 = toggle ROM0
Ctrl-1 = toggle ROM1
Ctrl-2 = toggle RAM write-protection
Ctrl-A = ex af,af'
Ctrl-D = ex de,hl
Ctrl-X = exx
Ctrl-I = toggle ei/di
Ctrl-T = toggle debugger transparency
Disassembly View:
U = execute until condition is met
Keypad-7 = single step 1 instruction
Keypad-8 = step over instruction
Keypad-9 = step out of function
Keypad-4 = step 10 instructions
Keypad-5 = step 100 instructions
Keypad-6 = step 1000 instructions
Left/Right = scroll 1 byte
Up/Down = scroll 1 instruction
PgUp/PgDn = scroll 1 page
Ctrl-Left/Right = move PC by 1 byte
Ctrl-Up/Down = move PC by 1 instruction
Text/Number View:
Up/Down = scroll by 1 line
Left/Right = scroll by 1 byte
PgUp/PgDn = scroll by 1 page
Graphics View:
1/2/3/4 = select screen mode
Up/Down = scroll by 1 line
Left/Right = scroll by 1 byte
Ctrl-Up/Down = zoom in/out
Ctrl-Left/Right = adjust column width by 1 byte
PgUp/PgDn = scroll by 1 column
Ctrl-PgUp/PgDn = scroll by 1 page
Single-stepping a HALT instruction will step into the interrupt handler,
assuming interrupts are enabled. Stepping over a HALT will completely
execute the handler, as if stepping over a call. Step-over also recognises
JP/JR instructions, and will single-step to follow the jump rather than
attempting to step over it.
To return to the current execution point after browsing other memory
locations, press A to enter a new address and enter "pc" as the expression.
Alternatively, single-step and the view will automatically return to the
next instruction.
To aid to debugging, conditional instructions show whether or not the
condition is met by the current flags. This makes it easy to determine
whether a jump will be taken, with an arrow indicating its direction.
Double-clicking on an instruction in disassembly view will set an execution
breakpoint for that address (no matter where it's paged in memory). There's
currently no way to list existing breakpoints, or set explicit new ones.
Perhaps the most powerful feature in the current implementation is the 'U'
command, which executes until an expression is met. You can create complex
expressions using the following operators, symbols and functions:
Operators
Unary: + - ~ ! =
Binary arithmetic: + - * / %
Logical: && ||
Comparison: == != < > <= >=
Bitwise arithmetic: & | ^
Bitwise shift: << >>
Symbols:
Single registers: a f b c d e h l i r ixh ixl iyh iyl
Double registers: af bc de hl af' bc' de' hl' ix iy sp pc
Interrupts: ei di iff1 iff2 im
Paging: lmpr hmpr vmpr mode lepr hepr rom0 rom1 wprot
Display: dline sline lcycles
Functions
PEEK <addr> = 8-bit lookup in currently paged RAM
DPEEK <addr> = 16-bit lookup in currently paged RAM
IN <port> = non-zero if previous instruction accessed the port
OUT <port> = non-zero if previous instruction accessed the port
The '=' unary operator has a special use in expressions. Its operand is
evaluated immediately, and the value inserted in the expression instead of
the operand itself. The first example below shows why this can be useful.
Example expressions:
Break when the current value of HL changes: hl != =hl
Break at the next HALT instruction: peek pc == 0x76
Break when a floppy command is written: out 224
Break when screen mode 3 is selected: mode == 3
Break when 12345 is top of stack: dpeek sp == 12345
Break when the raster is drawing screen line 0: sline == 0
Break when A, B and IXl are equal: (a == b) && (b == IXl)
Execute Until breakpoints are only temporary, and cleared when the debugger
is next activated, regardless of whether they were triggered. This also
applies to other simple breakpoints, such as step-out and step-over.
Values are displayed in hex in both disassembly and number modes, but values
used in inputs and expressions can be in many different bases. The
following number formats can bs used:
Decimal: 12345
Character: "a" or 'a'
Binary: %10101100 or 10101100b
Hexadecimal: 0x1234 or 1234h or $1234 or &1234 or #1234
Octal is not supported, so leading zeroes have no special meaning.
* * * * * * * * * * * * * * * * * * * * * * * * * * * * * * * * * * * * * *
ENHANCING THE EXPERIENCE
The default SimCoupe options balanced between performance and convenience.
On modern systems you can tune the performance-related settings to give an
experience closer to the real machine:
- On the System menu select 'TV Aspect Ratio', or press F5 to toggle from
1:1 to 5:4 mode. SAM pixels are not square and this option more closely
represents the TV aspect ratio.
- On the View menu, under the Border Area sub-menu, select 'Large
(TV-visible)'. Non-Windows versions can select this in the Display section
of the main options (F10). This increases the number of vertical border
lines shown, which is closer to a real TV/monitor, and needed to view border
effects in some demos.
- In the Display section of the options, disable the Frame skipping option
and select 'all frames' from the drop-down list. This ensures all video
frames are drawn, preventing background processes disturbing the emulation.
- If using a CRT monitor, check if there is a 100Hz option available for
your current display mode. 100Hz is a multiple of SAM's 50Hz display
frequency, and will give smoother scrolling and animation. If you're lucky
enough to own a monitor that can do 50Hz it'll be even better!
- Under Windows, try disabling the 'Use RGB/YUV video overlay' option in the
Display section of the Options, to improve image quality. If you find it
makes little difference, or performance suffers, re-enable it.
If you're willing to sacrifice convenience for an even more native
experience, you can also disable the following options:
- "Fast boot after hardware reset", in the System section
- "Fast disk access", in the Drives section
- "Auto-boot disks inserted at start-up screen", in the Drives section
- "Automagically boot non-bootable disks", in the Drives section
* * * * * * * * * * * * * * * * * * * * * * * * * * * * * * * * * * * * * *
OPTIONS
The section below describes all setting available in the Options (F10):
System
Main memory - the base SAM unit comes with only 256kB main memory, with an
internal add-on board to boost it to 512kB. Most software titles require
512kB to work correctly.
External memory - external add-on packs are available to extend memory in
1MB blocks. Programs needed to be written specially to use external memory,
with only a few titles doing so. They include MasterDOS, MasterBASIC and
the TopGun Demo.
Fast boot after hardware reset - accelerates the cold-boot process, avoiding
a few seconds delay while main memory is tested.
Patch ROM for hard disk booting - applies Edwin Blink's ROM modifications to
boot from an Atom hard disk. This option requires the standard built-in ROM
to be active, and an Atom interface to be configured in the Disks and Drives
sections.
ASIC startup delay on first power-on - implements a hardware quirk that
makes the ASIC unresponsive for around 50ms after first power-on. Newer SAM
ROMs include a work-around loop to wait for around 250ms before booting, but
old ROMs lack the delay and won't work on newer SAM hardware.
Display
Use DirectDraw hardware acceleration [Win32] - uses the hardware features of
your video card to stretch the emulated display. You should only ever need
to temporarily disable this if troubleshooting display driver issues.
Use RGB/YUV video overlay [Win32] - use a special video card feature
normally used for movie playback. This is well supported even on quite old
hardware, giving acceleration even when DirectDraw support is minimal. This
may not give the best quality output, especially on older hardware that
supports only YUV.
Stretch full-screen display to fill screen - scales the display up to fit
the full screen resolution. Not recommended when scanlines are enabled due
to banding artefacts.
Limit full-screen display to 256 colours - despite SAM only having 128
palette colours, using this helps avoid the soft filtering effect most video
cards apply when stretching. Recommended if you prefer a sharper display,
but you also need to avoid other stretching options.
Auto-skip to maintain full emulation speed - drops video frames if the
emulation is struggling to match original SAM speed. With the option
disabled, you can choose a fixed number of frames to display, with 'all
frames' recommended for faster machines.
Sound
Enable Philips SAA 1099 sound chip - enables output from the internal
6-channel sound chip, used for music and sound effects.
Enable Spectrum-style beeper - enables output from the basic port 254
speaker bit, as used by 48K Spectrum software and the BASIC
BEEP/ZAP/POW/ZOOM commands.
Stereo sound output - the internal sound chip outputs stereo, but disabling
this option will combined all channels to mono output.
Buffering - controls the size of internal buffer used for sound preparation.
Smaller buffers give less lag between generated effects and when you'll hear
them, but make the emulator less able to cope with changes in running speed
caused by other running programs. The default should work for most people,
but increase it if you're having problems.
Drives
D1 - select whether floppy drive 1 is present in the left-hand bay. This is
the drive used by disk booting from the ROM.
D2 - select whether floppy drive 2 is present in the right-hand bay. You
can also select to have an Atom HDD interface connected to this bay, which
will require a real device or HDF image file to be selected for it on the
Disks options page.
Fast disk access - automatically accelerates the emulation speed when any
disks are active, to speed up disk loading. The sensitivity level controls
how quickly it should return to normal running speed once disk access
terminates. Programs that spend time processing data read from disk will
require lower sensitivity to load at maximum speed, but this will also risk
missing the first couple of seconds of music/intro after loading.
Ask before saving disk image changes - prompts for confirmation before
saving modifications back to disk images when they are ejected. This
doesn't apply to changes saved manually using Ctrl-F1/F2.
Auto-boot disks inserted at startup screen - automatically boot from disks
inserted into drive 1 when at the stripey boot screen.
Automagically boot non-bootable disks - detects booting from an unbootable
disk and temporarily replaces the boot disk with either an internal DOS
image or a user-specified disk. Once DOS has booted the original disk is
restored and the "auto*" boot process continued (if required). Helps avoid
the disk-switching hassle when dealing with data-only disks.
Disks
Floppy drive 1/2 - selects the disk image to insert into virtual drive 1 or
2. Pressing F1/F2 during the normal emulation gives quick access to disk
insertion. The drop-down list gives the option of physical floppy drives,
if available.
Atom Hard Disk - selects an HDF image or physical device (from drop-down
list) to use as the Atom hard disk device by BDOS.
SD-IDE Hard Disk - selects an HDF image or physical device to use for the SD
Software IDE interface by HDOS.
YAMOD.ATDISK Hard Disk - selects an HDF image or physical device to use for
Yarek Adamski's IDE interface.
For the 3 hard disks, select '...' to browse for an existing image or create
an new HDF image. To create a new one simply enter a size and new filename
then click Create.
For your safety, you can only select physical devices that contain an
existing BDOS or HDOS filesystem. You must prepare the disk on a real SAM
before use with SimCoupe.
Paths
Floppy disk images - default directory used when prompting for floppy disk
images
Hard disk images - default directory used when prompting for hard disk
images
ROM images - default directory used when prompting for alternative ROM
images
Screenshots / Data files - default location used for saving screenshots,
printer output, and other data files.
If no path is given the default location is either the directory containing
the SimCoupe program [Win32], the user's preferences directory [OS X] or the
user's home directory [Linux/BeOS/QNX/...].
If a disk is already in the drive, browsing starts from the location of the
previous file. To browse from the default location simply eject the old
disk first.
Input
Mapping mode - in the default SAM Coupe keyboard mode, letters and symbols
are automatically mapped to the key sequence required to generate the same
symbol on the SAM. For example, pressing Shift-0 on a PC keyboard generates
')', but Shift-0 on the SAM generates '~'. SimCoupe detects that Shift-0
would generate ')', and converts it to Shift-9 to generate the same symbol
on the SAM. If you require a literal Shift-0, select the raw mapping mode
first. The Spectrum mode is useful when using an unmodified Spectrum ROM,
or other Spectrum software.
Use Left-Alt for Cntrl key - maps the Left-Alt key to the Cntrl key on the
SAM keyboard, in addition to the Right-Ctrl key. Left-Alt is located in a
similar keyboard position to SAM's Cntrl key. Note: enabling this option
blocks normal Windows menu combinations, such as Alt-F for the File menu.
However, you can still press and release Alt to activate the menu, then
press F to open the file menu and navigate as normal.
Use Alt-Gr for Edit key - maps the Right-Alt key to the Edit key on the SAM
keyboard. Alt-Gr is located in a similar keyboard position to SAM's Edit
key.
Use keypad-subtract key for reset - allows the '-' key on the numeric keypad
to be used as a SAM reset button, in addition to F12. The key is
conveniently located near Num-9, used for SAM's F9 key to BOOT disks.
Use function keys for SAM keypad - swaps the functionality of the function
keys and the numeric keypad. By default the keyboard function keys are used
for emulator features, and the numeric keypad is mapped to SAM's own
function keypad.
Enable mouse interface - select to use your own mouse to control an emulated
SAM mouse. Note: most s1 oftware will detect the presence of the mouse
interface on boot-up, so you should enable this BEFORE you load it.
Swap mouse buttons 2 and 3 - the default button mapping is L/M/R to SAM
buttons 1/2/3, but with this option enabled it's 1/3/2. Few titles require
all 3 buttons, and you may prefer to use the larger right mouse button for
SAM's button 2.
Joystick [Win32]
Joystick 1/2 - selects the Windows device to use for SAM joystick 1 (keys
6,7,8,9+0) and/or joystick 2 (keys 1,2,3,4+5). If your device isn't listed,
check the Game Controllers option in Control Panel to ensure your device is
working correctly.
Dead-zone - controls the dead zone around the centre point of analogue
devices, to prevent small unwanted movements from being seen. This has no
effect with digital devices.
Parallel
Port 1/2 - selects the device to connect to the virtual printer port. With
Printer selected you have a choice of printing to a file or a real printer
device. Mono-DAC emulates a 7-bit mono sound device, and EDdac/SAMdac a
6-bit stereo device. The latter is highly recommended for use with
Printer device [Win32] - if Printer is selected above, this is the file or
device to use for output. The "File:" option auto-generates a unique file
to hold the output, and saves it to your Data Files path. "Printer:"
entries are real printer devices to use for output, which must be compatible
with a real SAM - don't expect any old printer to work!
Auto-flush print data - specifies the idle time needed at the end of a print
job before flushing the printer output. When printing to a file this will
close the current file, so new output will go to a different file. When
printing to a real device this will ensure the final page is flushed out.
If you experience problems with single jobs being split due to delays
mid-print, select 'Disabled' and flush the end of the job using the Tools
menu option [Win32].
MIDI [Win32]
MIDI function - select whether MIDI OUTput is connected to a Windows MIDI
device. Used by a few utilities for music playback to an external keyboard.
MIDI Out - the Windows device to use for output. This will usually default
to a sound card synthesiser, but could also be an external keyboard
connected to your PC's sound card.
MIDI In - not currently supported, but may be used for network support in
future versions.
Misc
SAMBUS clock - the most common clock hardware interface, as used by
MasterDOS and BDOS.
DALLAS clock - advanced clock hardware, supported by BDOS.
Advance SAM time relative to real time - link passing time to real time
rather than emulated time. By default the SAM clock is synchronised to real
time on startup, and advances by 1 second for each 50 emulated frames. This
prevents programs running under emulation from detecting any time
discrepancy. With this option enabled the SAM clock will always match real
time, regardless of how much time passes in the emulator.
Pause the emulation when inactive - automatically pause when SimCoupe is no
longer the active application, or is minimised.
Show disk drive activity lights - enables on-screen LEDs in the top left of
the display, showing when the floppy drive motor is active. Floppy LEDs are
green, hard disk LEDs are orange.
Show status messages - enables the display of status text in the bottom
right of the display. This are used to indicate the effect of various user
actions, such as ejecting disks and changing runtime options.
Profiling statistics - shows emulator performance in the top-right of the
display. By default this shows the percentage of SAM running speed (ideally
100%) and the current display frame rate (ideally 50fps). You can also
display a breakdown of how much running time was used for CPU emulation,
graphics drawing, sound generation, display blitting/stretching and idle
time remaining for other system tasks.
FnKeys [Win32]
Here you can redefine the default function key mappings, as shown in the
KEYBOARD INPUT section.
* * * * * * * * * * * * * * * * * * * * * * * * * * * * * * * * * * * * * *
COMMAND-LINE OPTIONS
SimCoupe supports the following command-line options, which override setting
in the configuration file:
-sync <bool> Synchronise to 50Hz (default=yes)
-frameskip <int> Video frames skipping: 0=auto (default),
1=none, or 2-10 to show every 2nd to 10th
-scale <int> Windowed mode scaling: 1=50%, 2=100%, 3=150%
-ratio5_4 <bool> Stretch display width to 125% (default=no)
-scanlines <bool> Show vertical lines for a TV effect
-scanlevel <int> Scanline intensity percentage (default=75%)
-mode3 <bool> Show only odd pixels in low-res (default=no)
-fullscreen <bool> Start in full-screen mode (default=no)
-depth <int> Colour depth for full-screen (default=16)
-borders <int> Border size: 0=none, 1=small, 2=normal,
3=TV-visible, 4=full TV scan area
-stretchtofit <bool> Stretch fullscreen display (default=no)
-overlay <bool> Use video overlay if available (default=yes)
-hwaccel <bool> Enable hardware acceleration (default=yes)
-greyscale <bool> Greyscale mode (default=no)
-filter <bool> Bilinear filter in OpenGL mode (default=no)
-rom <path> 32K custom ROM (blank for default v3.0)
-hdbootrom <bool> Enable Atom HDD ROM patches (default=no)
-fastreset <bool> Skip SAM power-on memory test (default=yes)
-asicdelay <bool> ASIC delay on first start (default=yes)
-mainmemory <int> Main memory size in kB: 256 or 512 (default)
-externalmem <int> External memory size in MB: 0 (default) to 4
-drive1 <int> Drive 1: 0=none, 1=floppy
-drive2 <int> Drive 2: 0=none, 1=floppy (default), 2=Atom
-turboload <int> Fast disk access sensitivity (default=15)
-saveprompt <bool> Prompt before saving changes (default=yes)
-autoboot <bool> Auto-boot inserted disks (default=yes)
-dosboot <bool> Automagically boot DOS (default=yes)
-dosdisk <path> Custom DOS boot disk (blank for SamDos 2.2)
-stdfloppy <bool> Assume real disks are normal (default=yes)
-disk1 <path> Disk image file for drive 1
-disk2 <path> Disk image file for drive 2
-atomdisk <path> Atom hard disk image or device path
-sdidedisk <path> SD-IDE hard disk image or device path
-yatbusdisk <path> YAMOD.ATBUS hard disk image or device path
-floppypath <path> Default floppy image path
-hddpath <path> Default hard disk image path
-rompath <path> Default ROM image path
-datapath <path> Default save path for screenshots/printouts
-keymapping <int> Keyboard mapping mode: 0=raw, 1=SAM, 2=Spectrum
-altforcntrl <bool> Use Left-Alt for SAM Cntrl key (default=no)
-altgrforedit <bool> Use Alt-Gr for SAM Edit key (default=yes)
-keypadreset <bool> Use minus on keypad for reset (default=yes)
-samfkeys <bool> Use keypad for SAM Fn keys (default=no)
-mouse <bool> Mouse interface enabled (default=no)
-mouseesc <bool> Esc to release mouse capture (default=yes)
-swap23 <bool> Swap mouse buttons 2 and 3 (default=no)
-joydev1 <string> Joystick device for port 1 (default=none)
-joydev2 <string> Joystick device for port 2 (default=none)
-deadzone1 <int> Joystick 1 deadzone percentage (default=20)
-deadzone2 <int> Joystick 2 deadzone percentage (default=20)
-parallel1 <int> Parallel port 1 device: 0=none (default),
1=printer, 2=mono DAC, 3=stereo DAC
-parallel2 <int> Parallel port 2 device: 0=none (default),
1=printer, 2=mono DAC, 3=stereo DAC
-printerdev <string> Printer device name or path
-printeronline <bool> Printer online (default=yes)
-flushdelay <int> Printer flush delay in seconds (default=2)
-midi <int> 0=none (default), 1=midi synth [Win32]
-midiindev <string> MIDI-in device name/path (future)
-midioutdev <string> MIDI-out device name/path
-sambusclock <bool> SAMBUS clock (default=yes)
-dallasclock <bool> DALLAS clock (default=no)
-clocksync <bool> Clock synchronise to real time (default=yes)
-sound <bool> Sound enabled (default=yes)
-saasound <bool> SAA 1099 sound chip enabled (default=yes)
-beeper <bool> Spectrum-style beeper enabled (default=yes)
-stereo <bool> Stereo sound (default=yes)
-latency <int> Sound latency: 1=best, 5=(default), 20=worst
-drivelights <int> Floppy drive LEDs: 0=none, 1=top, 2=bottom
-profile <int> Profiling stats: 0=off, 1=simple (default),
2=detailed percentage, 3=detailed timings
-status <bool> Show status messages (default=yes)
-pauseinactive <bool> Pause emulator when application is inactive?
Key:
<bool> 0 or 1, true or false, yes or no
<int> an integer value in the range shown next to the parameter
<string> string of characters, in "quotes" if it contains spaces
<path> file/dir path, in "quotes" if it contains spaces
To restore the defaults settings, close SimCoupe and delete SimCoupe.cfg
[Win32], ~/.simcouperc [Linux], or "~/Library/Preferences/SimCoupe
Preferences" [OS X].
* * * * * * * * * * * * * * * * * * * * * * * * * * * * * * * * * * * * * *
THANKS
Allan Skillman - Father of the original SimCoupe
Dave Laundon - CPU contention and sound enhancements
Dr Ian Collier - Z80 core from his xz80 Spectrum emulator
Dave Hooper - Phillips SAA 1099 chip emulator
Dr Andy Wright - Permission to distribute the SAM ROMs
Sam Lantinga - Simple DirectMedia Library (SDL)
Shawn Hargreaves - Allegro games programming library
Jean-loup Gailly and Mark Adler - zlib compression library
Special thanks to Andrew Collier, Edwin Blink, Frode Tennebo, Steve
Parry-Thomas and Robert Wilkinson, for their active roles during
development. Thanks also to the sam-users mailing list, and everyone who
sent feedback.
* * * * * * * * * * * * * * * * * * * * * * * * * * * * * * * * * * * * * *
LINKS
SimCoupe Homepage:
http://www.simcoupe.org/
SimCoupe project page (latest source code):
http://sourceforge.net/projects/simcoupe/
World of Sam archive:
http://www.worldofsam.org/
Wikipedia entry for the SAM Coupe (and for more links):
http://wikipedia.org/wiki/Sam_Coupe
AmgiaOS 4 port:
http://drhirudo.hit.bg
* * * * * * * * * * * * * * * * * * * * * * * * * * * * * * * * * * * * * *
DISCLAIMER
THIS PROGRAM AND DOCUMENTATION ARE PROVIDED "AS IS", WITHOUT WARRANTY OF ANY
KIND, NOT EVEN THE IMPLIED WARRANTY OF MERCHANTABILITY OR FITNESS FOR A
PARTICULAR PURPOSE. BY USING THE PROGRAM, YOU AGREE TO BEAR ALL RISKS AND
LIABILITIES ARISING FROM THE USE OF THE PROGRAM AND DOCUMENTATION AND THE
INFORMATION PROVIDED BY THE PROGRAM AND THE DOCUMENTATION.
|